APIs
Imagine humans without any tools. Sure, we could sit around a fire (lit by lightning strike) and trade yarns, but we'd be a pretty boring bunch. Once we invented the hammer, the wheel, etc, we became really interesting.
So too with Copilot, except the tools are API endpoints.
API endpoints can be used for giving Copilot the following abilities:
- Retrieving data to display to the user or use in calculations
- Performing state-changing actions
- Interating with third-party services (either through your API, a tool like Zapier, or directly)
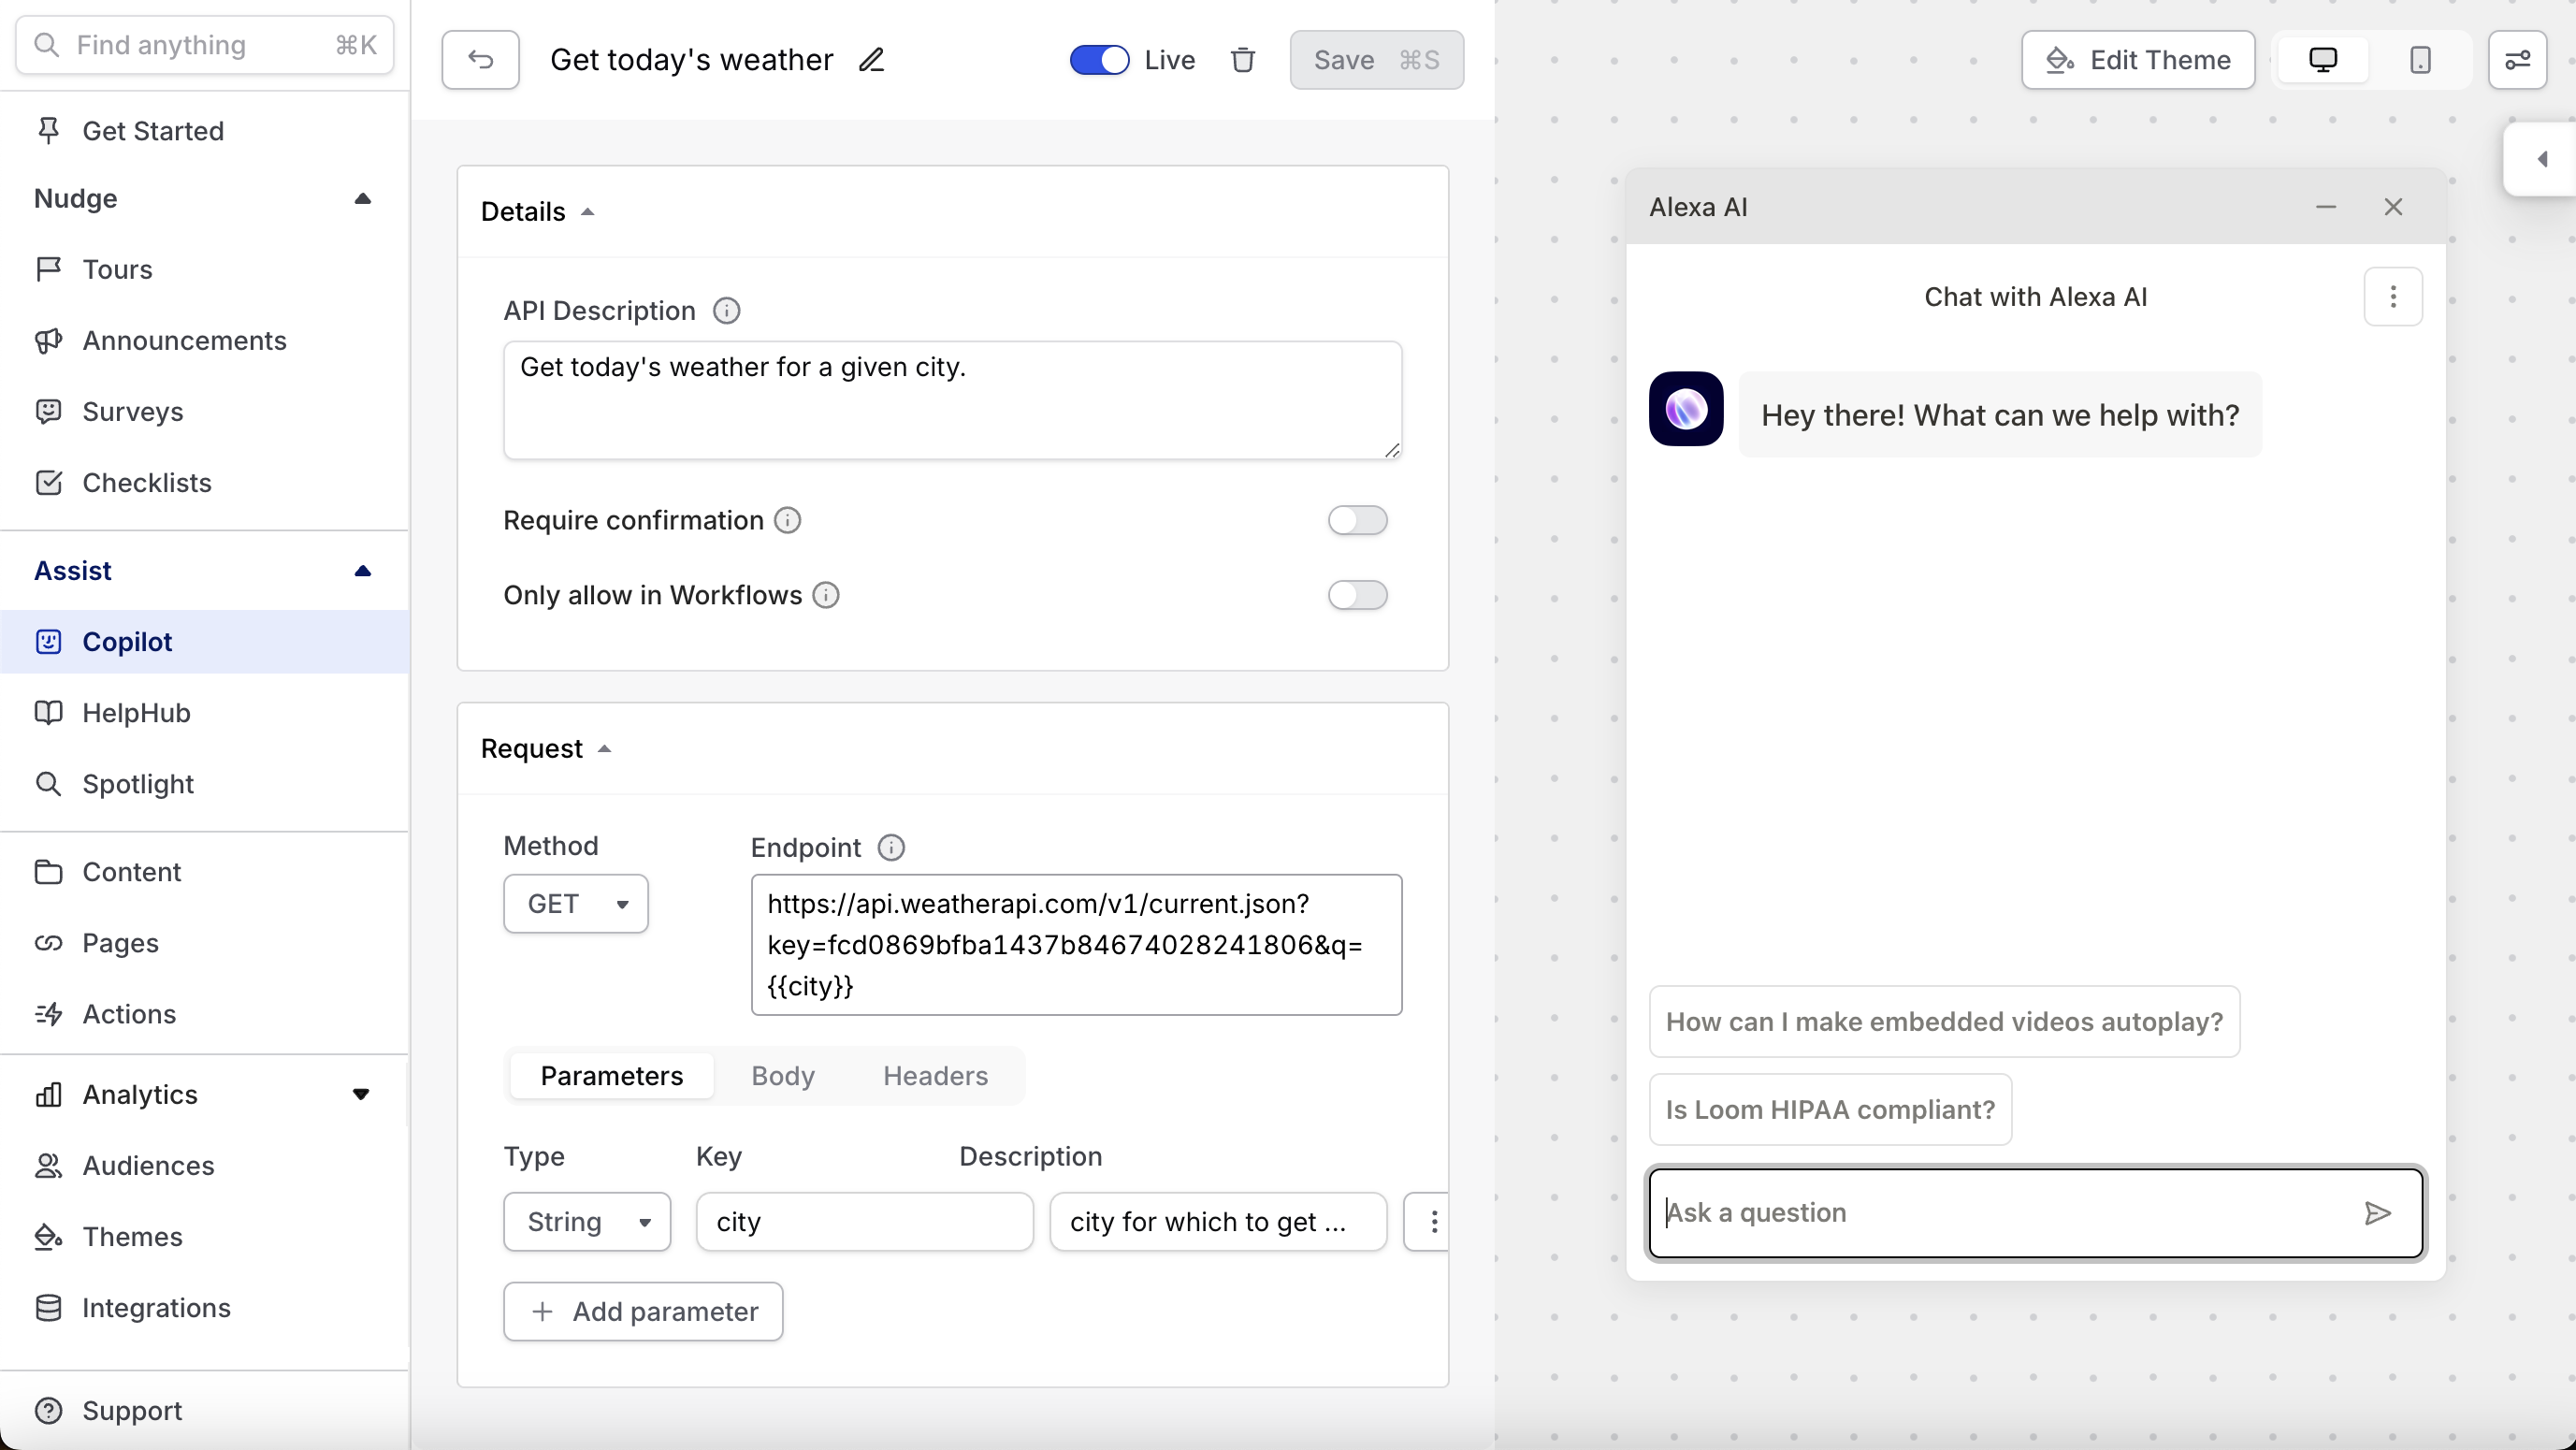
Adding API endpoints to Copilot
To do this, head to the Copilot section of your dashboard and select the APIs tab. From here, you'll see all the API endpoints that Copilot has available.
To create a new one, click New, and provide:
- A description of how the API endpoint should be used. You can describe the purpose of the endpoint, and situations in which it should and shouldn't be used.
- Provide the endpoint type. You can provide a state-changing API (like POST or PATCH) as well as an information-retrieval API (GET)
- Provide the endpoint itself.
- Describe the parameters of the endpoint. This will give Copilot the ability to flexibly ask for information from the user when it's needed to complete the request.
- Provide any body or header values. This section can be used to handle custom authenitcation.
Requiring confirmation
Some API endpoints could be dangerous if used flexibly. For example, imagine you have an endpoint that will delete a user's account. Dangerous! You don't want Copilot using this except when the user requests it extremely explicitly.
Our solution to this is the Require confirmation setting. When on, Copilot will never use the endpoint without first prompting the user with a messaging asking them for confirmation. This means that the endpoint won't be called silently (for example, as a precursor to a second call made before Copilot provides an answer.)
How Copilot uses API endpoints
API endpoints provided directly to Copilot are able to be used flexibly. Multiple endpoints can be called at once to inform a Copilot response. If Copilot needs to collect information from the user in order to use an endpoint, it can do that.
Only allow in workflows
You'll find there are situations where you want to create a Workflow that does something, and it needs an API to do that thing. So you add an API endpoint to support the workflow. In this situation, you might only want the API endpoint to be used in the context of acting on that Workflow. In these situations, you can toggle on "Only allow in Workflows".
This setting prevents Copilot from flexibly using the endpoint in situations it considers best. Normally, we recommend giving Copilot maximum flexibility. But if an endpoint really only has one use case, and you don't want Copilot's flexible use of the endpoint to "compete" with the Workflow, then this setting can be useful.
Handling authenticated APIs
Many APIs are authenticated. We currently offer 2 ways to handle this:
Defining Copilot API headers
While you can define headers for individual APIs in the Headers section of an API's settings, it's possible to set headers at a global level for all of your APIs. To do this, you can set copilotAPIHeaders in boot, for example:
window.CommandBar.boot(
  user.id,
  {},
  {
    copilotAPIHeaders: {
      Authorization: user.auth,
    },
  }
);
This allows you to set an authorization token for the current user in their current session.
Authenticating via HMAC
While we recommend the option above, this authentication method is also available, but requires code changes on your end. If you have identity verification enabled, Copilot will pass the provided HMAC and the provided user ID to any APIs it calls. You can then authenticate the HMAC against the user ID and the secret key. If the authentication is successful, then your API can run.